

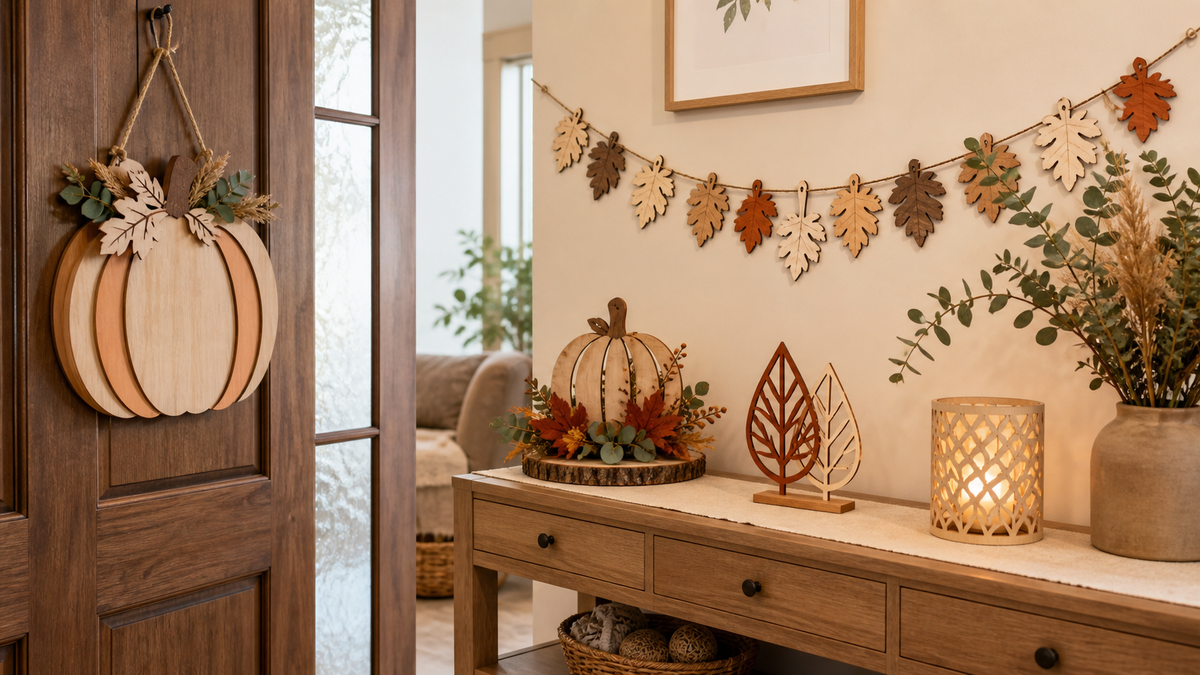
-
Select projects by work area, wood, assembly complexity, production time, and licensing.
-
Birch, basswood, and MDF differ in appearance, adhesive layers, smoke, and assembly; do not copy settings by name alone.
-
For layered designs, measure sheet thickness and slot tolerance before painting, gluing, and hanging.
-
Every project includes material and production checkpoints to help turn an idea into your own design file.
A strong fall decor project is more than a maple-leaf graphic. It must fit your material and work area, keep assembly manageable, and support finishing, gluing, and hanging. Choose 3 of the following 15 ideas and use your own files for the first prototype round.

Image: The large-format iKier K40 Max work area suits signs, layered decor, and coordinated home collections.
15 Project Ideas
| # | Project | Difficulty | Suggested material | Most important pre-production check |
|---|---|---|---|---|
| 1 | Layered pumpkin door sign | Medium | Three layers of 3mm birch plywood | Layer alignment and hanger load |
| 2 | “Hello Fall” round door hanger | Easy | 6mm wood base + 3mm text | Base flatness and text adhesion |
| 3 | Three-piece maple wall set | Easy | 3mm basswood or birch | Size proportions and hanging positions |
| 4 | Interchangeable seasonal welcome sign | Medium | Wood base + magnetic pieces | Magnet polarity and loose-part risk |
| 5 | Gratitude tree message board | Medium | 6mm base + 3mm leaves | Leaf quantity and writing space |
| 6 | Wooden pumpkin candle sleeve | Hard | 3mm birch | Decorative only; keep away from flame and heat |
| 7 | Woodland animal shelf figures | Medium | 3mm basswood | Base stability and slot tolerance |
| 8 | Six fall napkin rings | Easy | 3mm birch | Sharp edges, openings, repeat size |
| 9 | Thanksgiving place cards | Easy | 1.5–3mm basswood | Name proofing and thin-sheet warp |
| 10 | Five-layer harvest truck art | Hard | Five layers of 3mm birch | Scaled slots and layer order |
| 11 | Four fall-leaf coasters | Easy | 3mm MDF or cork | Flatness, water resistance, bottom protection |
| 12 | “Gather” kitchen sign | Medium | 6mm base + 3mm text | Hanging, glue, and surface sealing |
| 13 | Halloween house silhouette | Medium | 3mm MDF or black cardstock | Thin bridges and fire risk |
| 14 | 3D acorn table piece | Medium | 3mm basswood | Measured thickness and joint fit |
| 15 | Fall photo frame | Medium | 3mm birch + identified protective sheet | Window size and protective-sheet composition |
Before sending a design to the laser, check closed paths, size, slot tolerance, and test-cut result. For external files, save creator, version, and license from the original page. This protects creators and prevents structural problems from appearing only during production.
Choosing Birch, Basswood, or MDF
| Material | Appearance | Cost considerations | Cutting characteristics | Best projects |
|---|---|---|---|---|
| Birch plywood | Clear grain, visible layers | Sheet, sanding, and sealing | Glue and knots affect penetration; layered edge | Signs, frames, layered art |
| Basswood plywood | Pale, fine grain, easy to color | Good thin-sheet yield; include warp loss | Usually light; thin sheet can warp | Leaves, place cards, fine parts |
| MDF | Even surface, no natural grain | Include exhaust, edge sealing, and paint | More smoke and odor; verify adhesive SDS | Painted silhouettes, coasters, bases |
Include waste, sanding, paint, glue, magnets, sealer, and labor in the purchase list. State the coloring and sealing process with product photos so customers understand that the result combines cutting, assembly, and finishing.
Layered Project 1: Pumpkin Door Sign
-
Divide the file into base, pumpkin outline, and text. Close every path and convert floating letters to bridges or separate applied text.
-
Run a small matrix on same-batch 3mm birch; record model, speed, power, passes, and air assist. Do not copy percentages across models.
-
Cut the largest base first, then nest small layers in the remaining space. Sort parts by number.
-
Lightly sand smoke marks, dry-fit, paint, and let dry completely. Glue with an alignment jig and load-test the hanger.
Layered Project 2: Harvest Truck Art
Five layers can develop mismatched slots after scaling. Set final size first, adjust joints to measured sheet thickness, and cut a tolerance strip. Limit the palette to background, main color, and accent. Assemble back to front with two locating holes or a corner jig and record glue open time.
The provides an 850×800mm work area, 40–48W cutting/20–24W engraving modes, and autofocus for large signs or several layered sets on one sheet. The 410×410mm supports flexible small batches. With either model, calibrate assembly using a tolerance comb and focus test.
Layered Project 3: Interchangeable Seasonal Welcome Sign
Make the base once and use hidden magnets or replaceable slots for pumpkins, leaves, and words. Standardize magnet diameter and polarity and create a drilling/alignment jig. Keep magnets out of the laser path and never laser unknown coatings or adhesives. Complete 20 removal-and-installation cycles and assess swallowing risk around children or pets.

Scene illustration: Consistent wood, color, and layering can turn signs, wreaths, and tabletop pieces into a coordinated collection.
Publishing Checklist for Settings, Files, and Safety
-
For external files, retain creator, URL, version, personal/commercial license, and modification rights.
-
Record model, module mode, batch, thickness, speed unit, power, passes, air assist, and focus.
-
Do not process unknown materials, PVC, or coatings with an unknown SDS.
-
Supervise every cut and use a suitable enclosure, exhaust, and fire-safety setup.
-
Treat the candle sleeve as decor only; proximity to heat or flame requires separate fire-resistance and clearance assessment.
For a large sign or multiple sets on one sheet, start with K40 Max; for layered pieces within 410×410mm, K1 Pro 24W is more compact. At iKier, we recommend making the same project 3 times and comparing dimensional stability, edge quality, and assembly time.
Technical Checks Before Publishing a File
Use vector software to find duplicate lines and open paths. Duplicate lines add another pass and more charring; open paths prevent clean separation. Place scoring, shallow engraving, and cutting on named layers, then confirm output settings layer by layer in control software.
Do not draw a 3mm slot just because the sheet is labeled 3mm. Measure five points with calipers, record mean and range, and cut a multi-width tolerance comb. Paint, sealer, and glue add thickness, so perform the final fit test after finishing.
One Finished-Product Acceptance Standard
Check front smoke, backside residue, pointed details, dimensions, slots, glue, sharp edges, hanging, and color. Lay layered art flat for 24 hours to inspect warp. Test signs with the actual hanger, recording load and cycles. Add child/pet warnings for magnets and small parts. Record failed components separately.
Place a material card and finished-product card beside each file: one lists sheet, model, settings, and batch; the other lists dimensions, assembly, licensing, and cautions. Readers can reproduce a workflow instead of seeing an untraceable result.
Conclusion
A practical fall project needs four things: a usable file, identified material, tested settings, and a complete assembly check. After choosing, browse and select work area and power by finished size and nesting needs.
FAQ
Q1: Can I cut a downloaded SVG immediately? A: No. Check duplicate lines, open paths, layers, size, slot tolerance, and whether the license permits your use.
Q2: Should a slot for “3mm” sheet be exactly 3mm? A: Not by label alone. Measure several points, use a tolerance comb, and include final finish thickness.
Q3: Can a wooden candle sleeve be placed near an open flame?
